
Gravel driveway repair starts with diagnosing the root cause — whether it’s a failed base layer, poor drainage, or migrating gravel. From there, we tackle surface issues like ruts, potholes, and low spots by clearing debris, rebuilding the base, and compacting fresh gravel. Costs range from $100 for basic regrading up to $1,500 for full resurfacing. Keep the right tools on hand, and you’ll handle most repairs yourself — and we’ll show you exactly how.
What’s Actually Wrong With Your Gravel Driveway?

Before you grab a shovel and start throwing gravel around, you need to understand what’s actually causing your driveway problems. Most issues trace back to a few core culprits: poor gravel composition, inadequate drainage, heavy traffic, and neglected surface wear over time.
We’ll often see homeowners dump fresh gravel onto a driveway without diagnosing the root problem first. That’s just wasted money. If your base layer has shifted or compacted unevenly, new gravel won’t fix anything.
Walk your driveway and look for these specific issues:
- Ruts and low spots from vehicle weight
- Gravel migrating onto your lawn
- Erosion channels from water runoff
- A thinning surface layer exposing the base
Identifying the exact problem determines the right repair approach.
How Much Does Gravel Driveway Repair Cost?

Repair costs vary widely depending on what’s actually wrong and how much driveway you’re dealing with. Several cost factors influence your final bill, and different repair techniques carry different price tags.
Repair costs vary widely — what’s wrong and how much driveway you have both play a major role.
Here’s what you’ll typically spend:
- Regrading and leveling — $100–$300 for a standard single-car driveway
- Adding fresh gravel — $30–$50 per ton, with most driveways needing 1–3 tons
- Pothole and rut filling — $150–$500 depending on damage severity and driveway length
- Full driveway resurfacing — $500–$1,500 for complete gravel replacement and compaction
DIY repairs cut costs considerably, but renting a plate compactor or grading equipment adds $100–$200 per day. We recommend getting at least two contractor quotes before committing to professional repair techniques.
Tools and Materials You’ll Need for Gravel Driveway Repair

Once you’ve got a handle on what repairs will cost, gathering the right tools and materials beforehand saves time and prevents mid-project trips to the hardware store. Different repair techniques call for different tool selection, so knowing your project scope matters.
Essential tools include:
- Rake and tamper for spreading and compacting gravel
- Wheelbarrow for transporting materials
- Shovel for moving and shaping gravel
- Garden hose for weed and debris removal
Key materials include:
- Crushed gravel or aggregate matching your existing driveway
- Landscape fabric for weed suppression in problem areas
- Edging stakes to contain loose gravel
- Binding agent or road base for severe rutting
Having everything staged before starting keeps the workflow smooth and efficient.
How to Fix Ruts, Potholes, and Low Spots in a Gravel Driveway
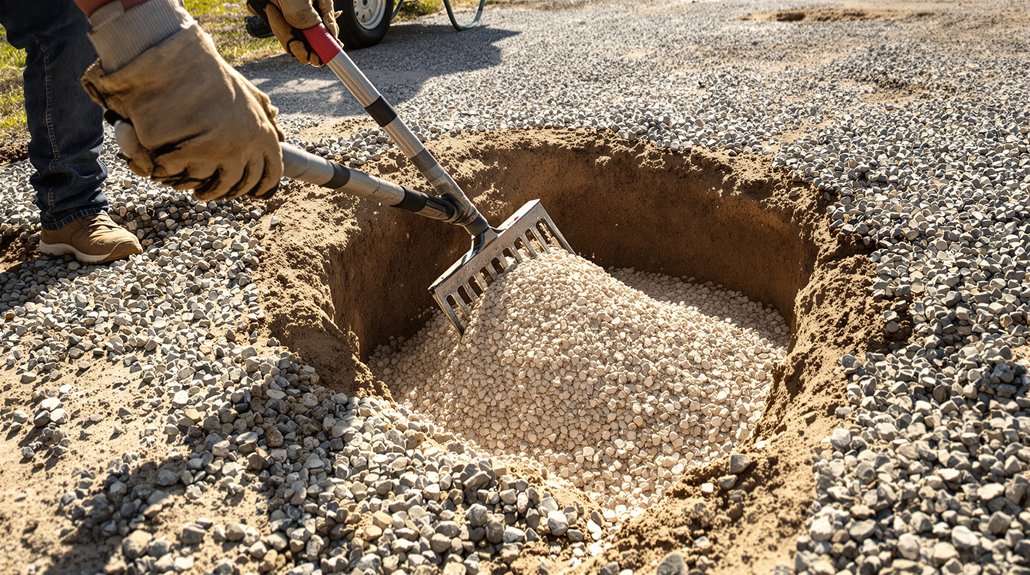
Tackling ruts, potholes, and low spots follows the same core process regardless of severity—clean the damaged area, rebuild the base if needed, and compact fresh gravel into place. Consistent rut management and pothole prevention start with these four steps:
- Clear debris — Remove loose stones, mud, and standing water from the damaged area using a rake and shovel.
- Grade the edges — Cut clean, stable borders around the damage so new gravel bonds properly.
- Rebuild the base — Fill deep voids with crushed stone or road base material before adding surface gravel.
- Compact thoroughly — Use a plate compactor or hand tamper to press gravel firmly, eliminating air pockets that cause future settling.
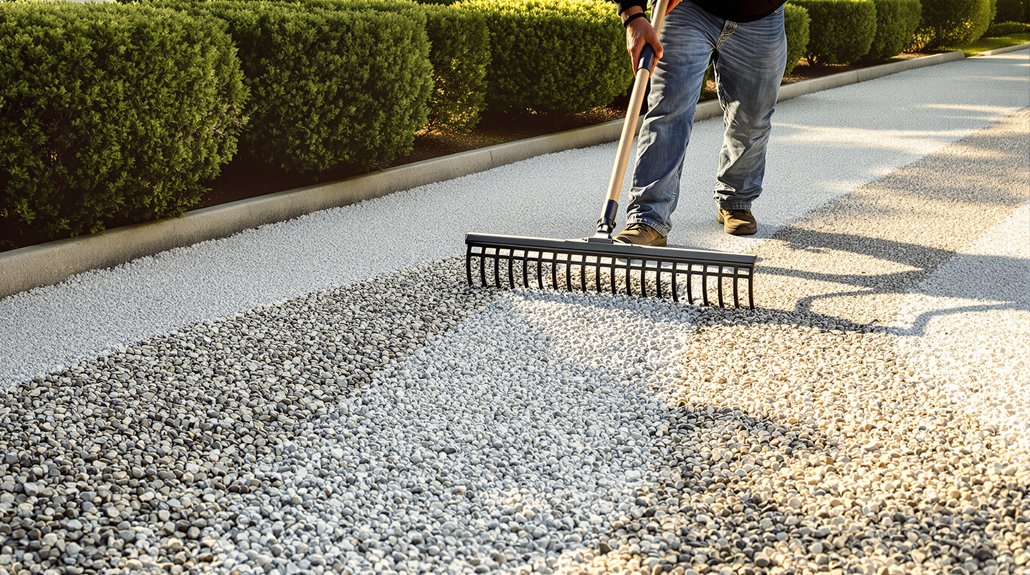
How to Regrade a Gravel Driveway the Right Way

Regrading restores the crown—the slight center-high arch—that channels water off your driveway instead of letting it pool and erode the surface. We recommend renting a box blade or drag blade attachment for a tractor or ATV to execute proper grading techniques efficiently. Start by pulling existing gravel from the edges back toward the center, rebuilding that essential crown profile.
Once we’ve re-established the shape, we top it with fresh gravel. Choosing the right gravel types matters here—crushed stone with angular edges, like #57 or crusher run, compacts and locks together better than rounded pea gravel. Spread two to three inches evenly across the surface, then compact it thoroughly with a plate compactor. Finish by confirming the crown slopes roughly one inch per foot toward each shoulder.
Edging and Drainage Fixes That Prevent Future Damage

Proper edging and drainage work hand in hand to keep a repaired driveway intact long after we’ve finished grading. Without both, gravel migrates and water carves ruts back into our work.
Edging and drainage work together — skip either one, and gravel shifts, water wins, and ruts return.
Choose edging materials and drainage solutions that match your specific conditions:
- Steel or aluminum edging — drives flush into soil, creating a sharp boundary that holds gravel in tight rows
- Landscape timbers or concrete curbing — builds a visible, sturdy wall that deflects tire pressure away from edges
- French drains alongside the driveway — channels subsurface water away before it saturates and destabilizes the gravel base
- Crowned grading with roadside swales — sheds surface water outward, preventing pooling that gradually dissolves compacted layers
Install these together, and we protect everything we’ve already repaired.
Maintenance Habits That Keep Your Gravel Driveway in Shape
Once we’ve repaired and edged our driveway, consistent maintenance is what keeps it from deteriorating back into ruts and bare patches. Regular gravel compaction and attention to drainage solutions make the biggest difference long-term.
| Task | Frequency |
|---|---|
| Rake and redistribute gravel | Monthly |
| Inspect drainage solutions | After heavy rain |
| Check gravel compaction | Every season |
| Add fresh gravel to thin spots | Annually |
| Clear debris from edges | Bi-monthly |
We should rake gravel back toward the center after each rain, preventing washout before it worsens. Running a plate compactor over high-traffic areas each spring keeps the surface firm. Addressing small issues immediately stops minor settling from becoming costly repairs.