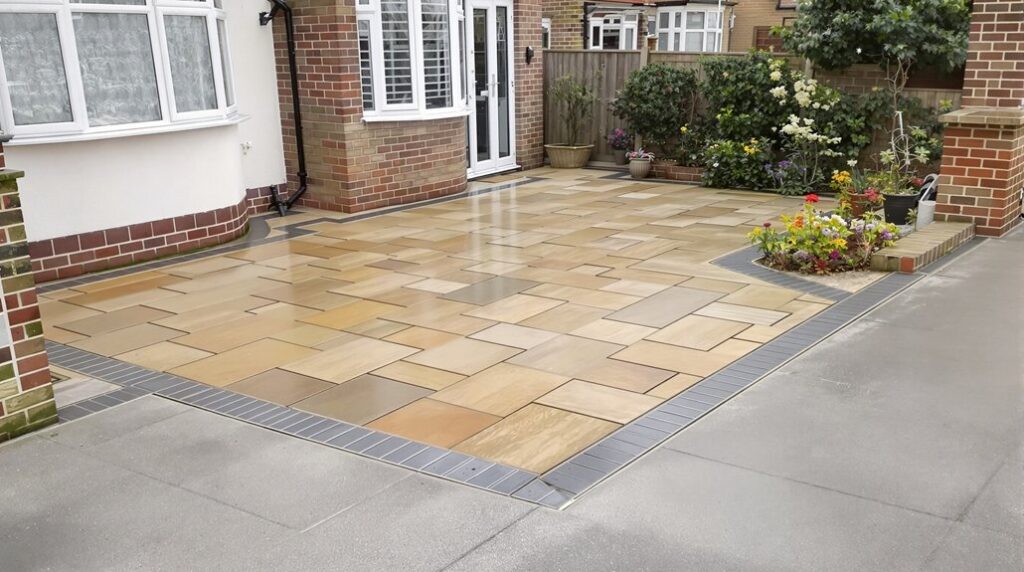
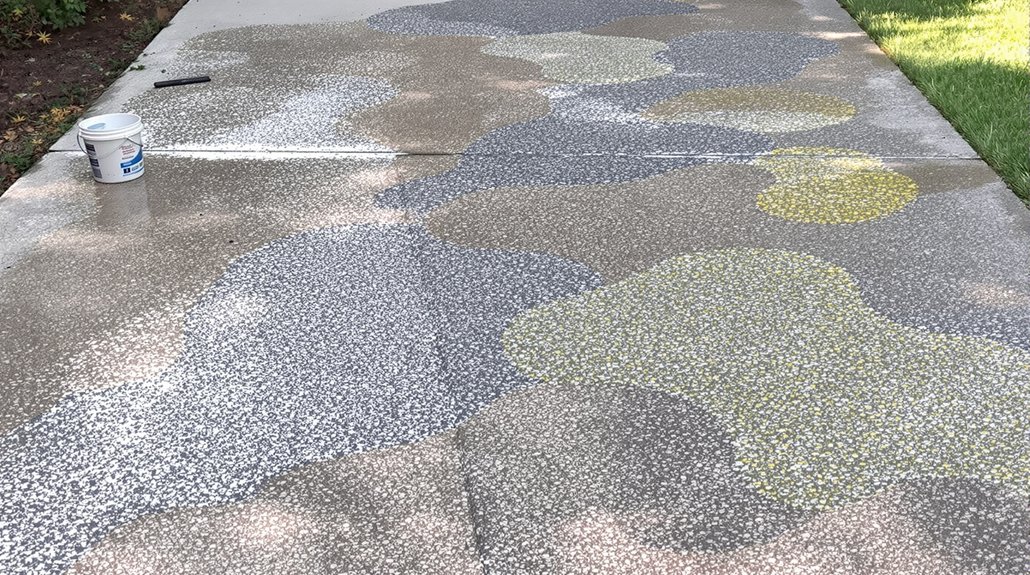
Concrete driveway resurfacing restores a worn, cracked surface to like-new condition for a fraction of full replacement costs. It’s best suited for driveways with minor cracking, surface discoloration, or light pitting. If more than 25% of your driveway shows severe damage, replacement is the smarter choice. Top products like Quikrete Concrete Resurfacer bond tightly and resist heavy traffic wear. We’ll walk you through everything you need to make the right call for your driveway.
Is Your Driveway a Good Candidate for Resurfacing?
Before investing time and money into resurfacing, you’ll want to confirm your driveway is actually a good candidate for the process. Resurfacing works best when the underlying concrete is structurally sound. If your driveway condition includes minor cracking, surface discoloration, scaling, or light pitting, it’s likely a strong candidate for surface repairs and resurfacing.
However, if you’re dealing with deep cracks, large broken sections, or significant shifting and settling, resurfacing won’t solve the problem. Those issues point to structural failure, meaning a full replacement is the smarter investment.
A good rule of thumb: if more than 25% of your driveway shows severe damage, skip resurfacing altogether. Otherwise, surface repairs paired with resurfacing can restore both function and appearance effectively.
Resurfacing vs. Replacement: Which One Do You Actually Need?

Once you’ve assessed your driveway’s condition, the next step is deciding whether resurfacing or full replacement makes more financial and practical sense. In any cost comparison, resurfacing wins on price—it typically costs 50–75% less than a full tear-out and repour. However, durability factors matter just as much as upfront savings.
If your driveway has widespread cracking, significant settlement, or compromised sub-base issues, resurfacing won’t solve the underlying problems. You’d basically be covering up structural failure, which shortens the lifespan of any overlay you apply.
Replacement makes sense when damage is deep, extensive, or structurally compromised. Resurfacing works best when the existing slab is structurally sound but cosmetically worn. Choosing the wrong option now costs you more money later.
The Best Concrete Resurfacing Products for Driveways
Choosing the right resurfacing product determines how long your driveway holds up, so it’s worth knowing the key differences between the main options available. Among the best brands, Quikrete Concrete Resurfacer and Sakrete Flo-Coat consistently deliver strong results for DIYers and professionals alike. These products bond tightly to existing concrete and resist cracking under heavy traffic and temperature shifts.
We also recommend considering polymer-modified overlays for driveways with moderate surface damage, as they offer greater flexibility and durability. Resurfacing techniques vary by product, so always follow manufacturer guidelines for mixing ratios and application thickness. Using the wrong technique with even a high-quality product leads to premature peeling or uneven surfaces. Matching the right product to your driveway’s specific condition makes all the difference.
How Thick Should the Resurfacing Layer Be?
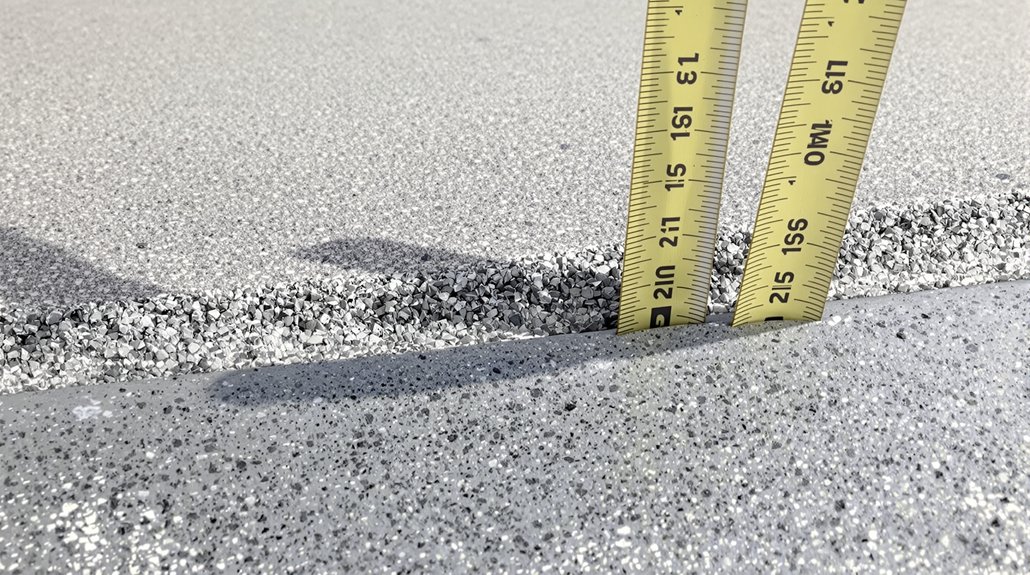
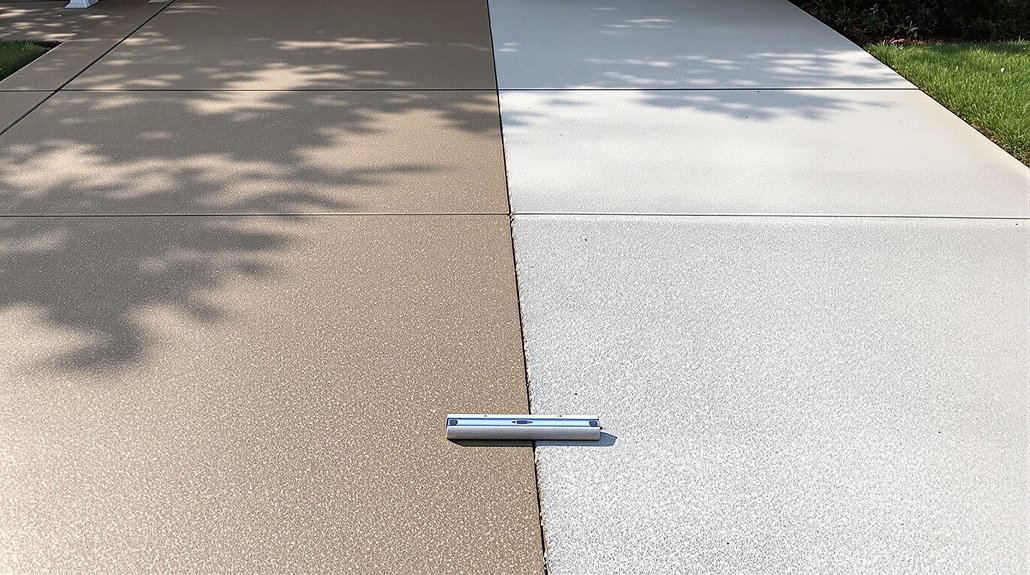
Getting the thickness right matters as much as choosing the right product. For most driveways, the ideal application sits between 1/4 inch and 1/2 inch thick. Go thinner than 1/4 inch and the layer won’t bond properly or hold up under vehicle weight. Go thicker than 1/2 inch without the right product and you’ll risk cracking as it cures.
We recommend checking your specific resurfacer’s guidelines, since some products handle different resurfacing thickness ranges. For deep cracks or low spots exceeding 1/2 inch, we’d suggest using a concrete filler first, then applying the resurfacer on top. Always feather the edges where the new layer meets existing concrete to avoid raised lips that can chip or catch tires over time.
Tools and Materials You’ll Need
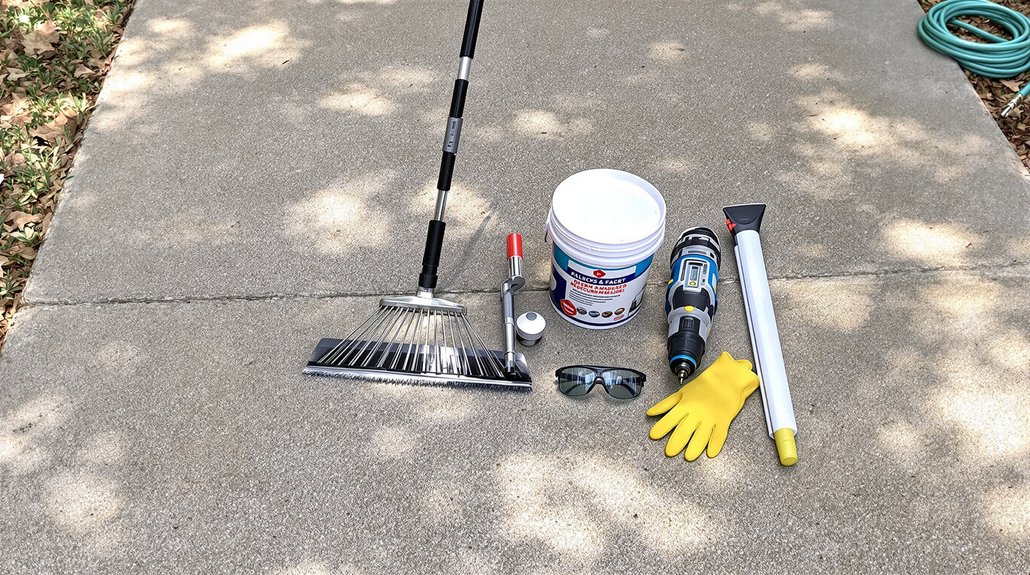
Before mixing a single batch of resurfacer, you’ll want to have the right tools and materials staged and ready. Different resurfacing techniques require specific equipment, so gather everything beforehand to avoid interruptions mid-project.
Stage your tools and materials before mixing a single batch—preparation prevents costly interruptions mid-project.
Tools you’ll need:
- Pressure washer
- Stiff-bristle broom or scrub brush
- Long-handled squeegee or gauge rake
- Mixing drill with paddle attachment
- Large mixing bucket
- Concrete edging trowel
Materials you’ll need:
- Concrete resurfacer (bagged or premixed)
- Concrete cleaner and degreaser
- Crack filler or patching compound
- Plastic sheeting for curing
Essential safety gear includes rubber gloves, safety glasses, and knee pads. Concrete resurfacer is caustic, so protect your skin and eyes throughout the entire application process. Having everything ready before you start keeps the workflow smooth and consistent.
How to Prep Your Concrete Driveway for Resurfacing
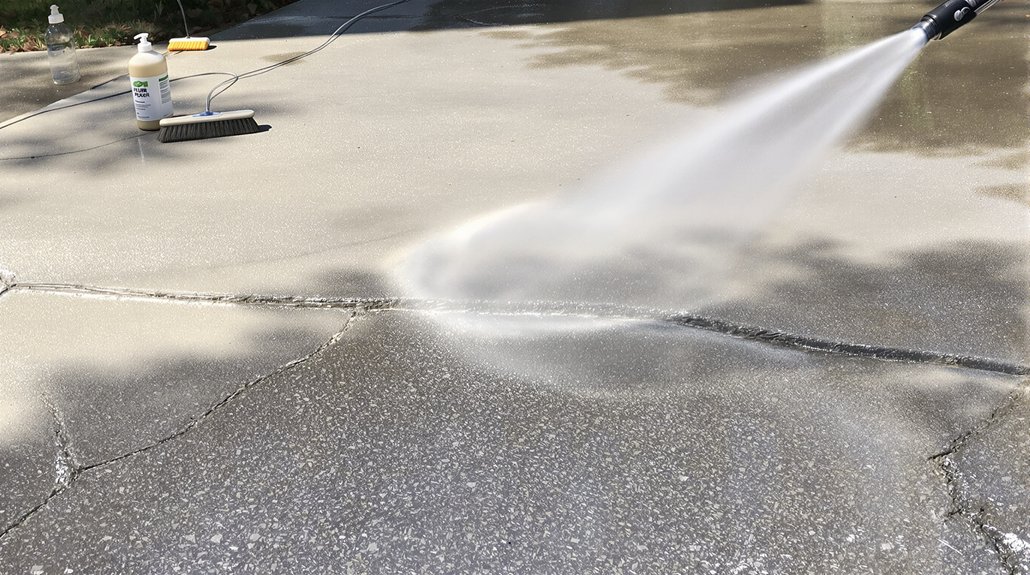
Proper prep work makes or breaks a concrete resurfacing job, so don’t rush this stage. We recommend tackling cleaning techniques and crack preparation before applying any resurfacer.
| Step | Action |
|---|---|
| Cleaning | Pressure wash the entire surface |
| Degreasing | Apply degreaser to oil stains |
| Crack Preparation | Fill cracks with vinyl concrete filler |
| Final Rinse | Allow surface to dry completely |
After pressure washing, inspect every inch for cracks wider than ¼ inch. We use a chisel to undercut damaged edges, creating a stronger bond for the filler. Let all repairs cure fully before resurfacing. Skipping these steps guarantees poor adhesion and premature failure of your new surface layer.
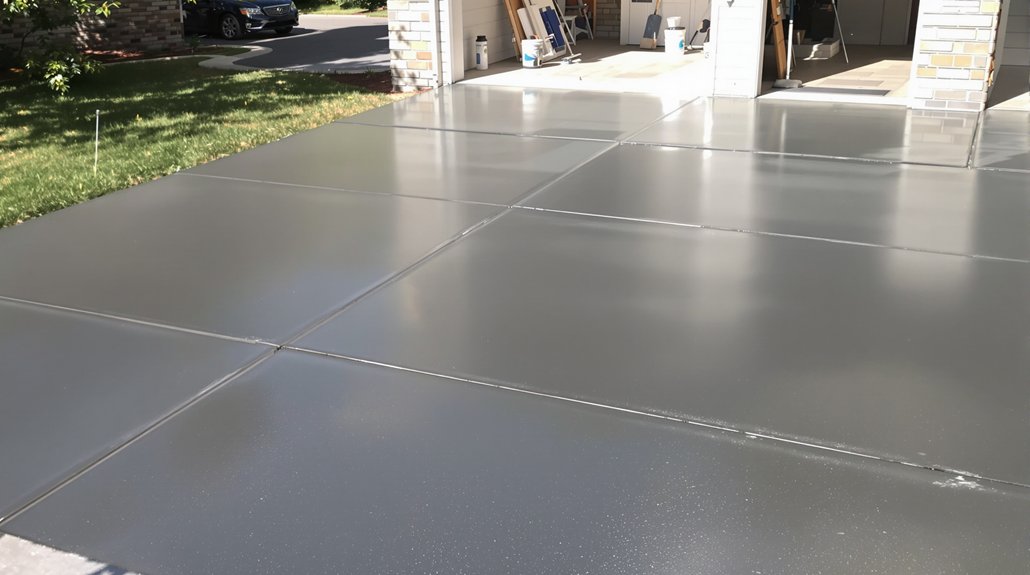
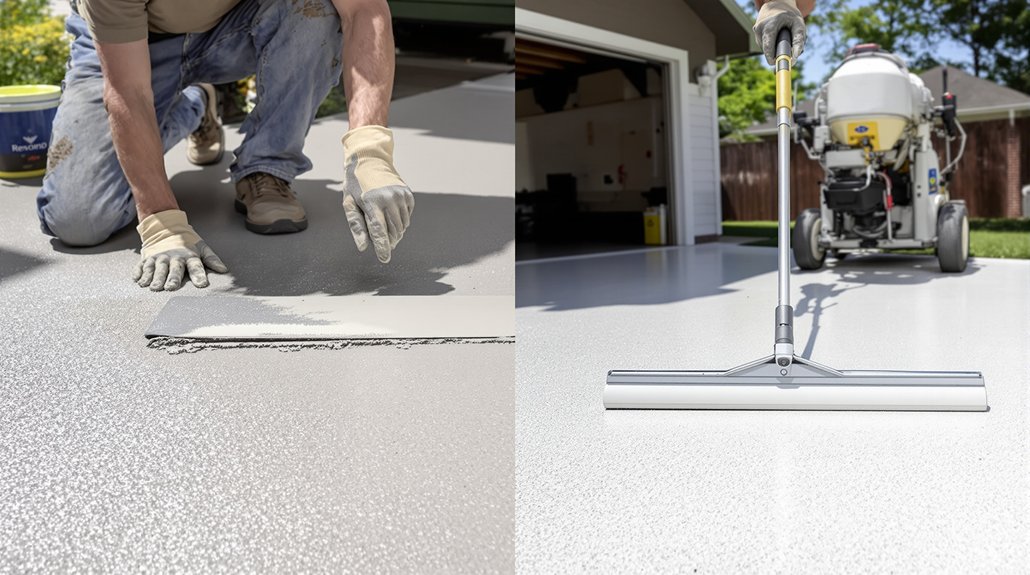
How to Resurface a Concrete Driveway Step by Step
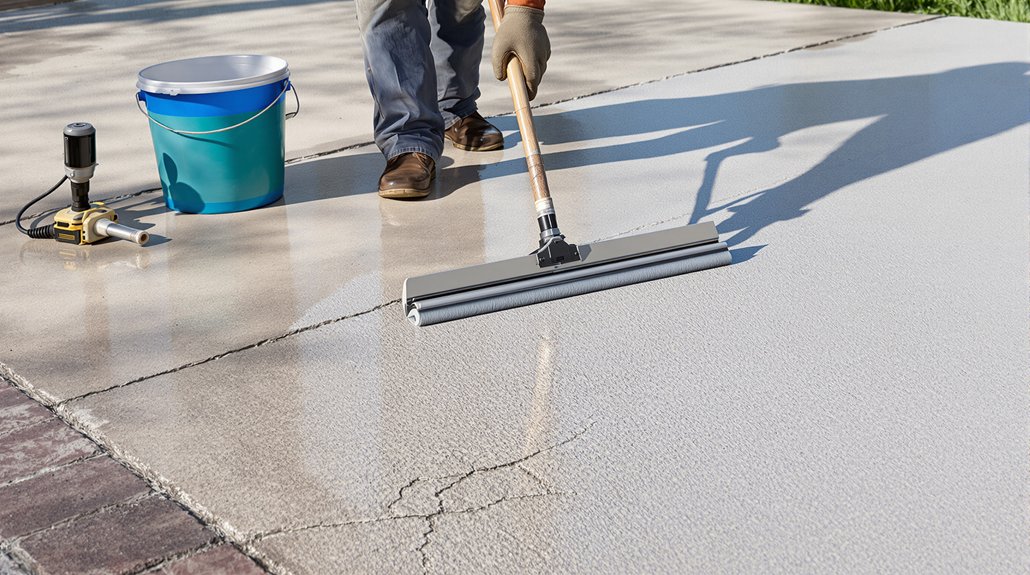
With your driveway cleaned, repaired, and fully dried, it’s time to apply the resurfacer. Before starting, review safety precautions—wear gloves, eye protection, and a respirator since resurfacer contains harsh chemicals.
Follow these steps:
- Mix the resurfacer according to label instructions until smooth and lump-free.
- Dampen the surface lightly—thorough surface preparation guarantees better adhesion.
- Pour the resurfacer onto one section and spread it using a long-handled squeegee.
- Work in small sections to prevent premature drying.
- Texture the surface with a broom for slip resistance before it sets.
- Allow proper curing time—typically 24 hours before foot traffic and 72 hours before vehicles.
Don’t rush the process; patience guarantees a durable, professional-looking result.
Common Concrete Driveway Resurfacing Mistakes to Avoid
Even the most prepared DIYers can sabotage a resurfacing job with a few avoidable mistakes. Skipping thorough surface preparation is the biggest one — if you don’t clean, repair cracks, and profile the existing concrete, the new layer won’t bond properly. Applying resurfacer over active cracking issues without addressing their root cause guarantees those cracks will return quickly. Mixing the product too thin or too thick ruins workability and durability. Working in extreme heat, direct sunlight, or freezing temperatures causes the material to cure unevenly. Pouring too thick a layer leads to shrinkage and delamination. We also see people skip control joints, which creates new cracking issues down the line. Take your time with each step — rushing any phase compromises the entire project.
How Long Does Concrete Driveway Resurfacing Last?

How long your resurfaced driveway lasts depends on several factors, but a properly done job typically holds up for 8 to 15 years. Resurfacing longevity hinges on the quality of materials used, the skill of the installer, your local climate, and how much traffic the surface endures.
We can’t stress enough how critical a consistent maintenance routine is to maximizing that lifespan. Sealing the surface every two to three years, promptly addressing cracks, and keeping the driveway clean all make a significant difference. Harsh winters with freeze-thaw cycles and heavy vehicle loads will shorten that window considerably.
If we cut corners during installation or neglect upkeep afterward, we’ll likely see deterioration well before that 15-year mark.
DIY Resurfacing vs. Hiring a Concrete Contractor
Deciding between DIY resurfacing and hiring a professional contractor comes down to your budget, skill level, and how much risk you’re willing to accept. Below is a cost comparison and project timeline breakdown to help you decide.
| Factor | DIY | Professional Contractor |
|---|---|---|
| Material Cost | $0.10–$0.25/sq ft | $3–$10/sq ft |
| Labor Cost | Free | $2–$7/sq ft |
| Project Timeline | 2–3 days | 1 day |
| Skill Required | Moderate | Expert |
DIY resurfacing saves money upfront but demands proper preparation and execution. Mistakes can shorten the surface’s lifespan considerably. Hiring a contractor costs more but delivers reliable, lasting results. We recommend professional help for driveways with extensive damage or complex surface conditions.