Cleaning your driveway isn’t just about looks—it prevents long-term damage like cracking, staining, and surface deterioration. We recommend pressure washing concrete and asphalt driveways at least twice a year, using the right tools and cleaning solutions for your specific material. Watch for warning signs like oil stains, algae streaks, or a persistently dull appearance. Whether you DIY or hire a pro, staying on top of maintenance protects your investment, and there’s a lot more to know before you start.
Should You DIY or Hire a Professional for Driveway Cleaning?
When it comes to driveway cleaning, one of the first decisions we face is whether to tackle the job ourselves or hire a professional. DIY cleaning can save money upfront, but a cost comparison reveals hidden expenses—equipment rentals, cleaning solutions, and time add up quickly. Professionals bring specialized tools and expertise, delivering thorough results efficiently.
Safety considerations also matter. Pressure washers operate at high force, risking injury or surface damage if mishandled. Professionals understand the correct pressure settings for different driveway materials, reducing these risks.
If our driveway has light staining and we’re comfortable with the equipment, DIY is reasonable. For deep stains, large areas, or delicate surfaces, hiring a professional is the smarter, safer investment.
What Kind of Driveway Do You Have?
Whether we DIY or hire a pro, the right approach also depends on what our driveway is made of. Different materials need different cleaning methods, pressures, and products. Understanding our surface helps us avoid costly damage.
| Material | Key Benefit | Cleaning Consideration |
|---|---|---|
| Concrete | Multiple concrete options available | Lower pressure recommended |
| Asphalt | Asphalt benefits include flexibility | Avoid harsh chemicals |
| Pavers | Decorative appeal | Seal after cleaning |
Concrete driveways handle regular pressure washing well, while asphalt surfaces need gentler treatment to prevent stripping their protective layer. Pavers require attention to joint sand between each unit. Knowing our material upfront saves us time, money, and unnecessary frustration during the cleaning process.
Signs Your Driveway Needs Cleaning
Most of us don’t think about our driveways until something obvious catches our eye, but several clear warning signs tell us it’s time for a cleaning. Driveway discoloration is one of the most common indicators — dark stains from oil leaks, rust patches, and green or black streaks from algae and mildew signal a surface that needs attention. We should also watch for surface damage like pitting, cracking, or flaking, which often worsen when dirt and moisture accumulate unchecked. Other red flags include embedded tire marks, white efflorescence deposits on concrete, and a generally dull or grimy appearance that no amount of rainfall seems to fix. Catching these signs early helps us prevent costly repairs down the road.
What You’ll Need Before You Start
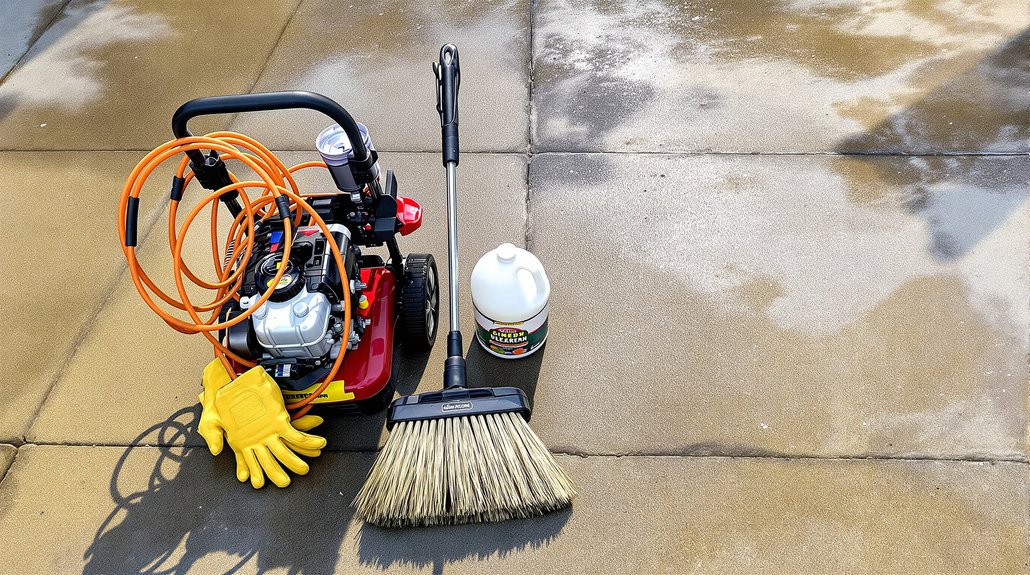
Once we’ve spotted the warning signs, the next step is gathering the right tools and supplies before we get started. Following solid preparation tips saves time and prevents mid-job frustrations. Here are the essential tools we’ll need:
| Tool/Supply | Purpose |
|---|---|
| Pressure washer | Removes deep stains and grime |
| Stiff-bristle brush | Scrubs stubborn spots manually |
| Degreaser/cleaner | Breaks down oil and grease |
| Safety goggles & gloves | Protects us during cleaning |
| Garden hose | Rinses away loosened debris |
With everything ready beforehand, we’ll work efficiently without unnecessary interruptions. Checking that our pressure washer functions properly and that we have enough cleaning solution guarantees a smooth, uninterrupted process from start to finish.
How to Remove Oil Stains Before You Wash
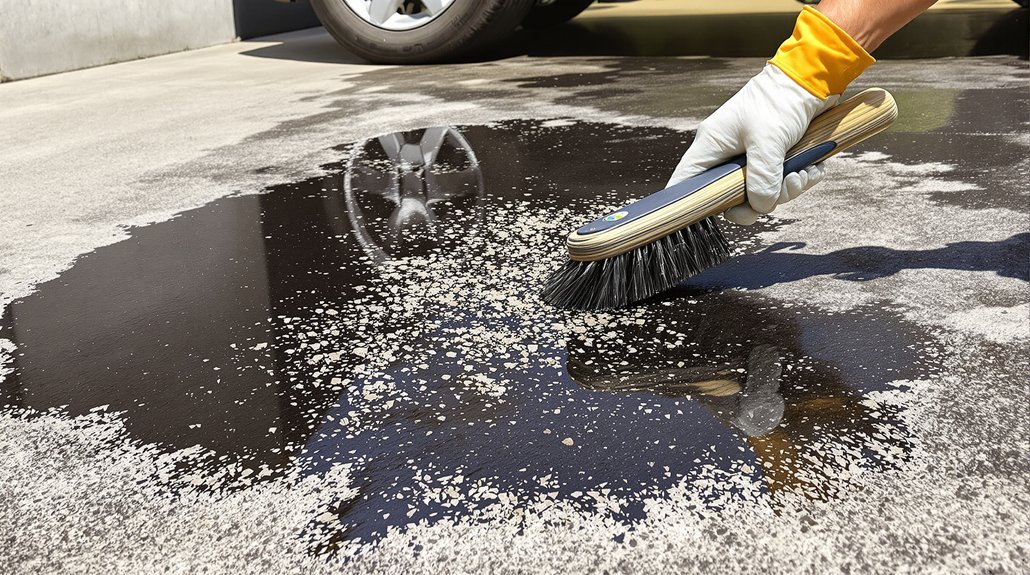
Oil stains are one of the toughest challenges we’ll face before washing our driveway, but tackling them first makes the entire cleaning process far more effective. Start by applying oil absorbents like cat litter, baking soda, or commercial degreasers directly onto the stain. Let them sit for at least 30 minutes to draw out the oil, then sweep the material away. Next, scrub the area with a stiff brush and a degreasing solution, working it into the surface before rinsing. For stain prevention going forward, seal your driveway annually to create a protective barrier against future oil penetration. Addressing stains before the main wash guarantees we’re not just spreading grease around, giving us a cleaner, more uniform result across the entire surface.
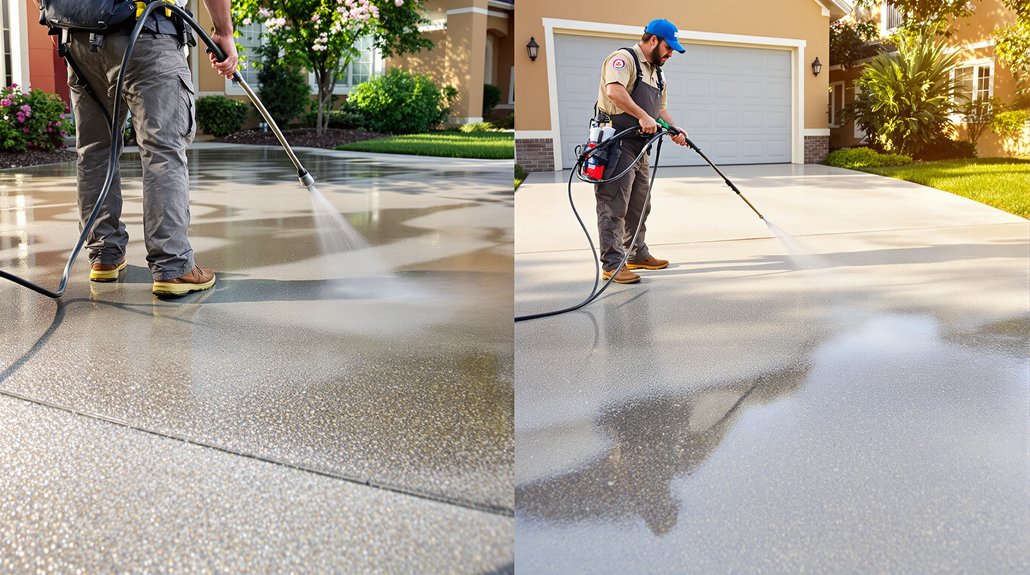
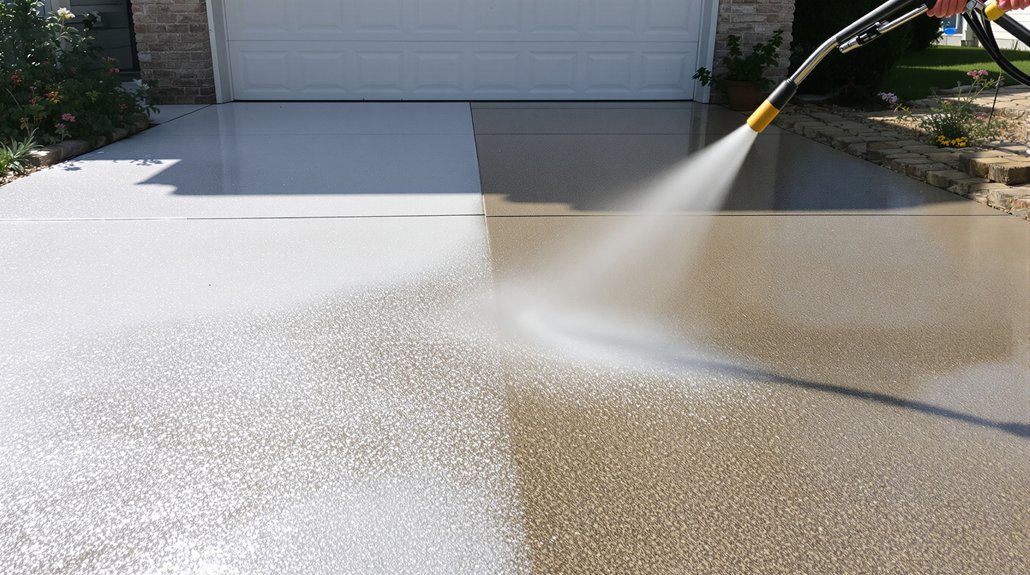
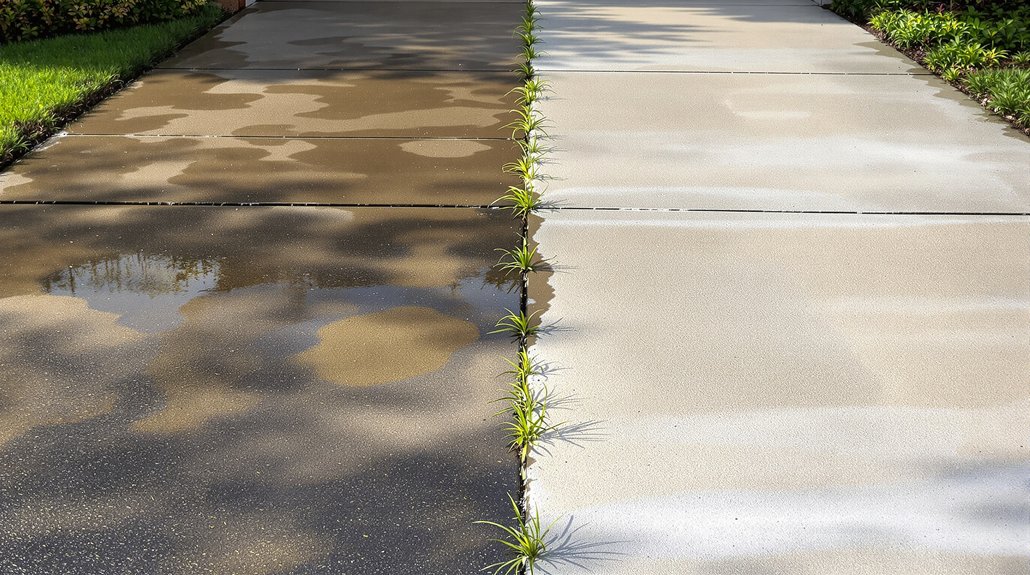
Pressure Washing Your Driveway the Right Way
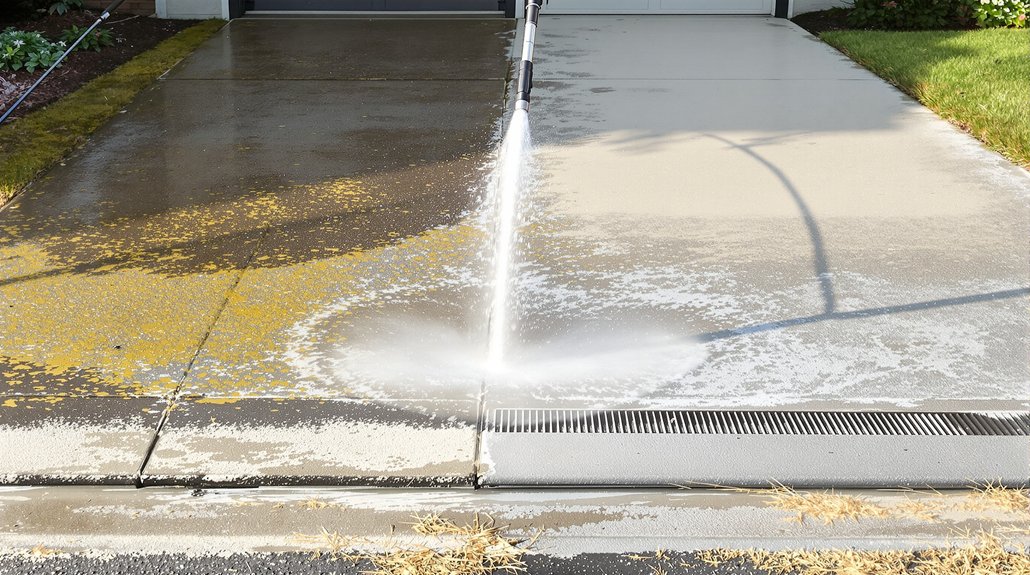
With our driveway prepped and stain-free, we’re ready to pressure wash. Among the best pressure techniques is starting with the right PSI — typically 3,000 PSI for concrete and 1,500 PSI for asphalt. We’ll attach a 25-degree nozzle for general cleaning and keep the wand 6–12 inches from the surface.
Work in consistent, overlapping strokes moving from one end to the other, never letting the spray linger in one spot too long. That prevents surface etching and streaking.
One of our top driveway maintenance tips is washing in sections, rinsing each before moving forward. Always spray at a slight downward angle, directing runoff away from landscaping. Once finished, let the surface dry completely before applying any sealant.
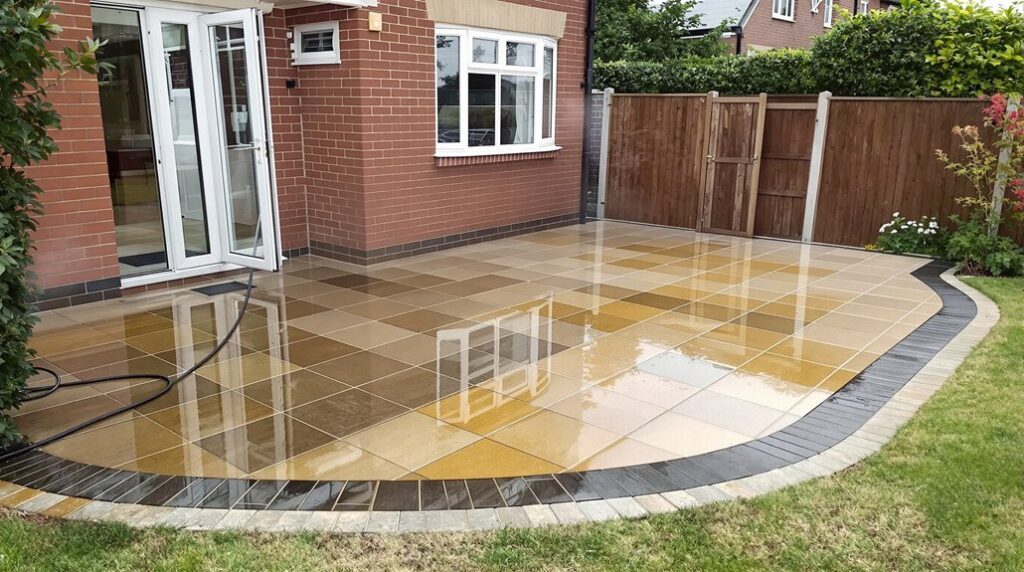
How to Clean Paving Stone Driveways Safely
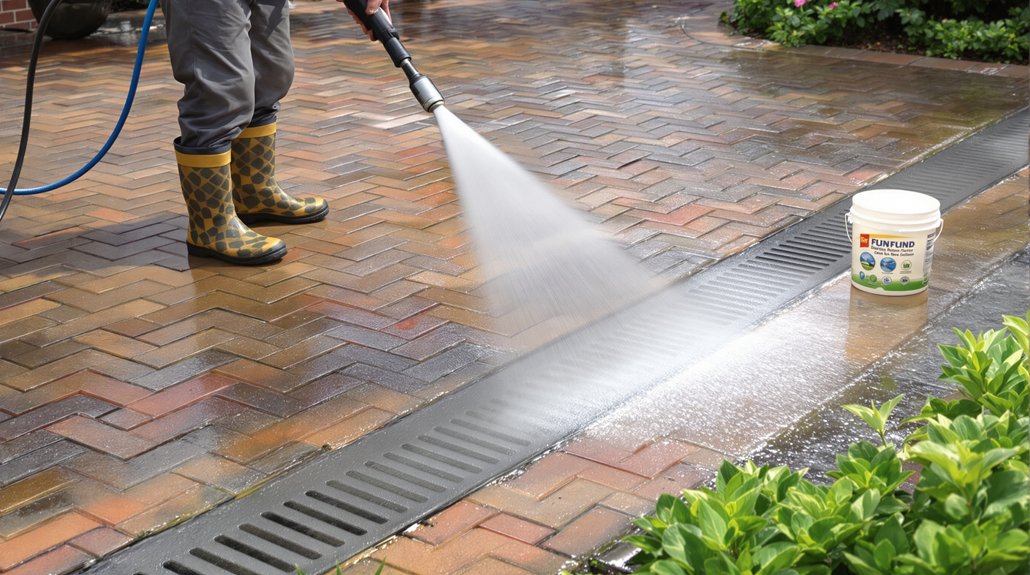
Pressure washing works great for concrete and asphalt, but paving stone driveways need a gentler approach. High pressure can dislodge joint sand and shift individual stones. For safe cleaning and proper paving stone maintenance, we recommend the following method:
| Step | Action |
|---|---|
| 1 | Sweep loose debris with a stiff broom |
| 2 | Apply a pH-neutral stone cleaner |
| 3 | Scrub with a soft-bristle brush |
| 4 | Rinse with low-pressure water |
After rinsing, inspect the joints for displaced sand and refill them as needed. We also suggest sealing the stones annually to prevent staining and weed growth. Avoid bleach or acidic cleaners — they’ll break down the stone surface and compromise its integrity over time.
Getting Rid of Moss, Algae, and Weeds
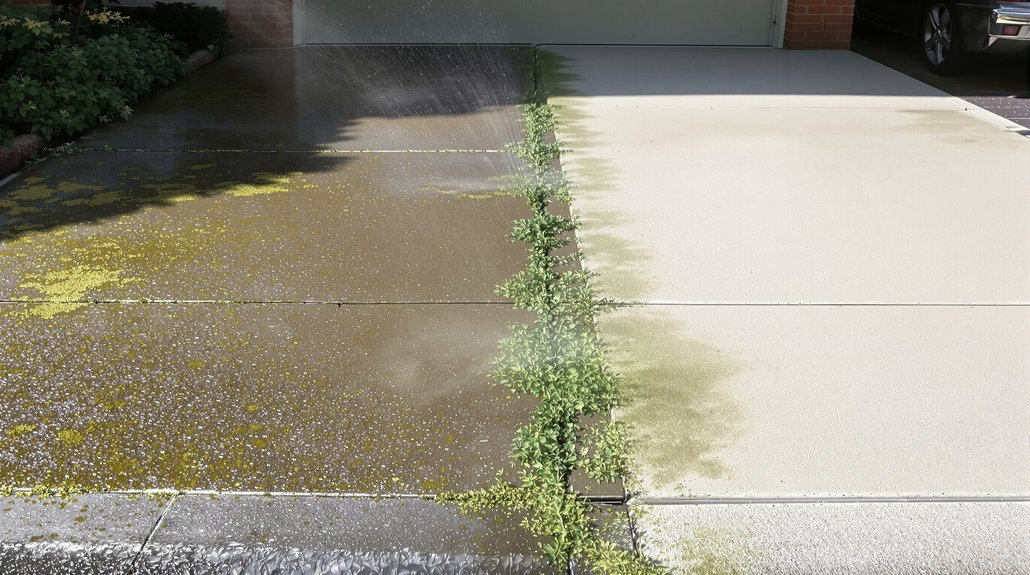
Moss, algae, and weeds don’t just look bad — they make driveways slippery and cause long-term surface damage if left untreated. Tackling these problems early keeps your driveway safe and structurally sound. Here’s how we recommend approaching moss removal and algae treatment effectively:
Moss, algae, and weeds don’t just look unsightly — left untreated, they create serious safety hazards and lasting structural damage.
- Moss removal: Scrape away visible moss manually, then apply a dedicated moss killer or diluted bleach solution
- Algae treatment: Use a proprietary algae remover or white vinegar solution, scrubbing thoroughly after application
- Weed control: Pull weeds by hand or apply a targeted weed killer along cracks and edges
- Prevention: Seal your driveway after cleaning to reduce moisture retention and inhibit future biological growth
Always rinse treated areas thoroughly and allow surfaces to dry completely before use.
How Often Should You Clean Your Driveway?

How often you clean your driveway depends on factors like surface material, local climate, and the level of daily traffic it handles. For most homeowners, a thorough cleaning twice a year works well, making seasonal cleaning a practical approach — once in spring to clear winter debris and once in fall to prepare for colder months.
However, driveways in wet or shaded areas may need more frequent attention to prevent moss and algae buildup. High-traffic driveways also benefit from spot cleaning between full washes.
Consistent driveway maintenance extends the surface’s lifespan and prevents stains from setting permanently. We recommend inspecting your driveway regularly, even between deep cleans, so you can address small issues before they become costly repairs.
Sealing Your Driveway After Cleaning
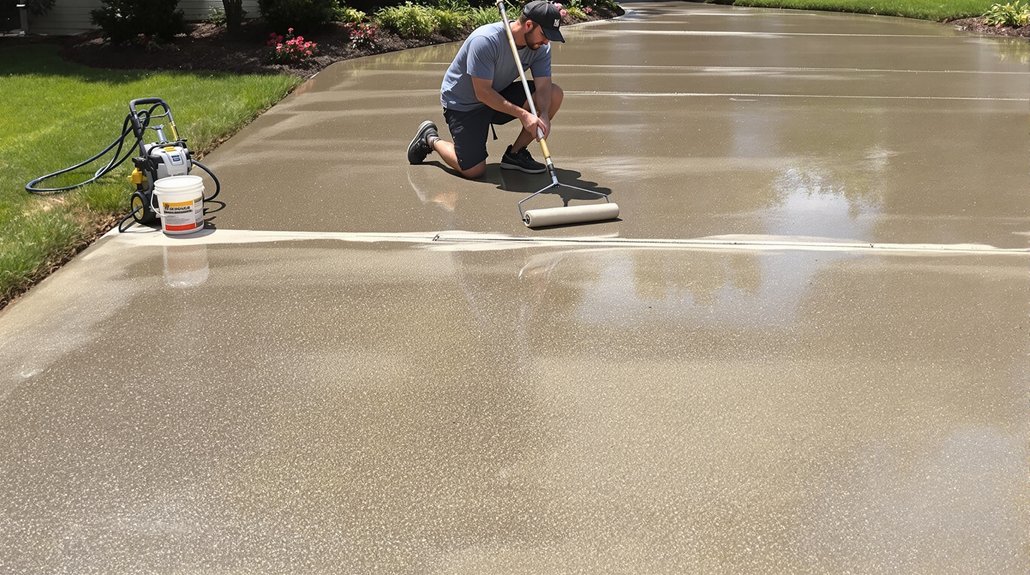
Once your driveway is clean, sealing it is the next step to protecting that work long-term. Driveway sealing locks out moisture, prevents cracking, and extends the surface’s lifespan. After applying proper cleaning techniques, we recommend waiting at least 24–48 hours before sealing to guarantee the surface is completely dry.
Here’s what to keep in mind before sealing:
- Choose the right sealer for your driveway material—asphalt, concrete, or pavers each require different products
- Check weather conditions—avoid sealing before rain or in extreme heat
- Apply thin, even coats to prevent peeling or bubbling
- Reseal every 2–3 years to maintain ideal protection
Skipping this step after cleaning leaves your driveway vulnerable to faster deterioration.