
Driveway sealing applies a protective coating over asphalt or concrete that blocks water, UV rays, oil, and chemicals from breaking down the surface underneath. It’s preventative maintenance, not just a cosmetic fix — it extends your driveway’s lifespan and prevents costly repairs down the road. We recommend sealing asphalt every 2–3 years and concrete every 3–5 years. Whether you’re going DIY or hiring a pro, there’s a lot more to get right than most people realize.
What Driveway Sealing Actually Does to Your Surface

Driveway sealing works by applying a protective coating over your asphalt or concrete surface, acting as a barrier against water, UV rays, oil, and chemical damage. It penetrates the pores of your driveway, preventing moisture from seeping in and causing cracks or erosion over time. Beyond surface protection, sealing also restores your driveway’s appearance, giving it a fresh, clean look. We often underestimate how exposure to daily wear gradually breaks down pavement materials. Sealing slows that process considerably. The long term benefits include reduced repair costs, extended driveway lifespan, and stronger resistance to seasonal temperature changes. Think of it as preventative maintenance rather than a cosmetic fix. Applied correctly and regularly, sealant keeps your surface performing well for years.
Signs Your Driveway Needs Sealing Now
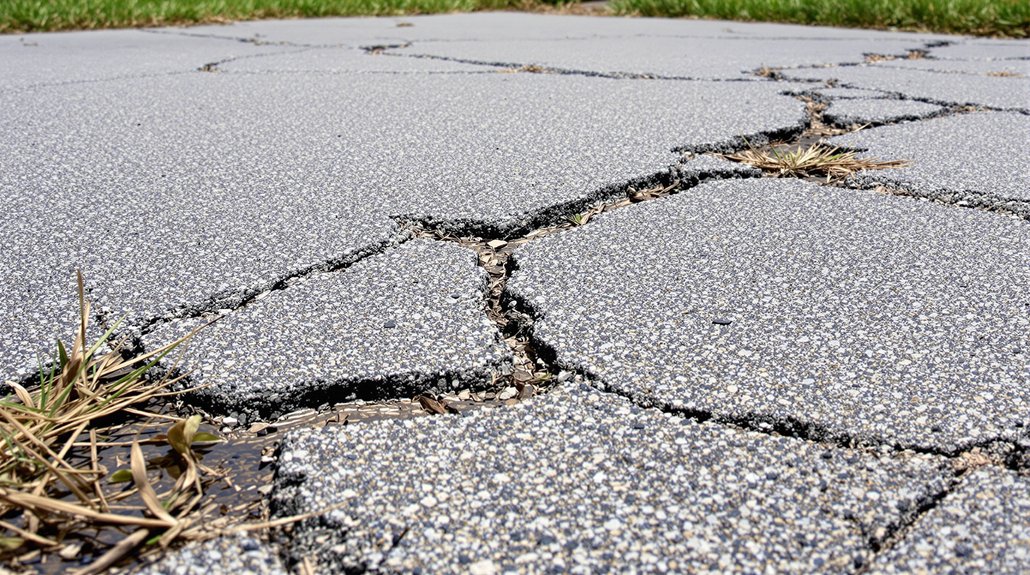
Knowing when to seal your driveway saves you from bigger, costlier problems down the road. Watch for these warning signs that surface maintenance is overdue. First, fading color means UV damage has stripped away your sealant’s protection. Second, small cracks forming across the surface indicate water infiltration has begun — and crack repairs become necessary before sealing can happen. Third, if water soaks into the asphalt rather than beading up, your protective barrier is gone. Fourth, crumbling edges signal structural weakening. Fifth, oil stains that won’t wash away show your surface is now porous and absorbing damage. If you’re spotting two or more of these signs simultaneously, don’t wait. Acting early keeps crack repairs minimal and your overall surface maintenance costs manageable.
The Different Types of Driveway Sealers Explained

Sealers aren’t one-size-fits-all — choosing the wrong type can leave your driveway worse off than before. Understanding sealant types helps us match the right product to our specific surface and conditions.
| Sealer Type | Best Application Techniques |
|---|---|
| Coal Tar | Squeegee or spray application |
| Asphalt Emulsion | Brush or squeegee application |
| Acrylic | Spray or roller application |
| Polyurethane | Professional spray application |
Coal tar offers maximum durability but requires careful handling. Asphalt emulsion suits eco-conscious homeowners with moderate traffic. Acrylic sealers penetrate deeply, enhancing color while protecting against UV damage. Polyurethane delivers the strongest resistance but demands precise application techniques — it’s typically best left to professionals. Matching your sealer to your driveway’s material guarantees lasting protection.
Concrete vs. Asphalt: Which Sealer Do You Actually Need?

Whether you have a concrete or asphalt driveway determines everything about which sealer you’ll need. These two materials have completely different compositions, so using the wrong product can cause serious damage or simply waste your money.
Concrete sealers penetrate or coat the surface to block moisture, stains, and freeze-thaw damage. They’re typically acrylic, epoxy, or polyurethane-based, and they work with concrete’s rigid, porous structure.
Concrete sealers block moisture, stains, and freeze-thaw damage by penetrating or coating the surface with acrylic, epoxy, or polyurethane.
Asphalt sealers, on the other hand, use coal tar or asphalt emulsion to restore flexibility and protect against UV rays, oil, and water. Applying an asphalt sealer to concrete — or vice versa — won’t bond correctly and can peel or crack.
Always confirm your driveway material before purchasing anything. It’s the most important step in the entire sealing process.
How to Prepare Your Driveway Before Sealing

Once you’ve confirmed your driveway material and picked the right sealer, preparation is what separates a long-lasting job from one that peels within a season. Proper cleaning techniques and surface repairs done beforehand guarantee adhesion and durability.
| Step | What to Do |
|---|---|
| Clear debris | Remove leaves, dirt, and loose gravel |
| Deep clean | Pressure wash the entire surface |
| Degrease | Apply degreaser to oil stains |
| Surface repairs | Fill cracks and patch potholes |
| Dry completely | Wait 24–48 hours before sealing |
Never skip surface repairs — sealer won’t bond over unstable or cracked areas. Likewise, cleaning techniques matter because oil, algae, or dirt left behind creates a barrier that blocks adhesion. Rushing this stage guarantees early failure.
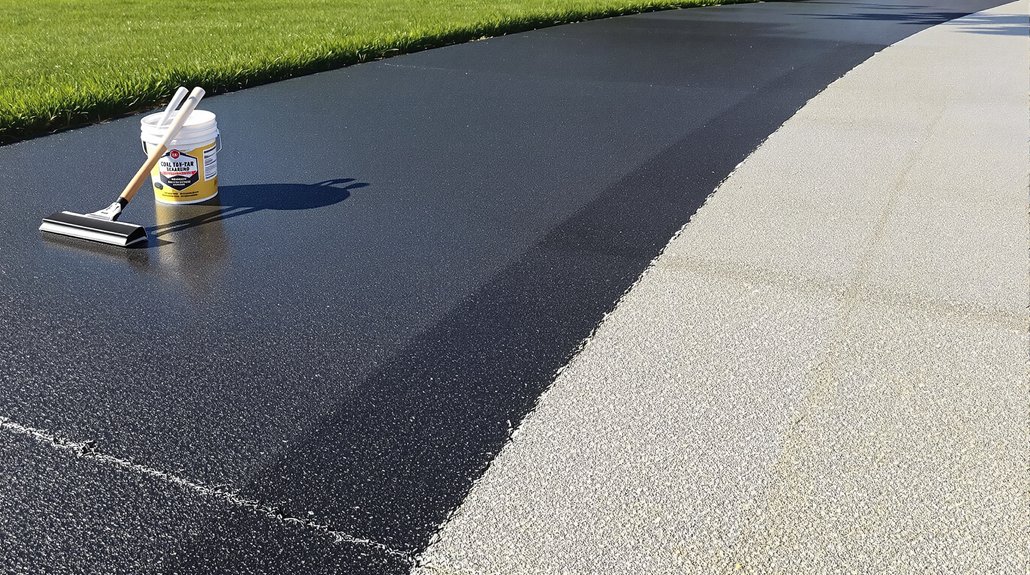
How to Seal a Driveway Step by Step

With preparation done, the actual sealing process moves quickly — but only if you follow the right sequence. Start by stirring the sealant thoroughly, then pour it directly onto the driveway in manageable sections.
We recommend working in strips across the width, using a squeegee or brush to spread the sealant evenly. Keep a wet edge as you move to avoid lap marks. Apply thin, consistent coats — two thin layers outperform one thick one in long-term driveway maintenance.
Let the first coat cure completely before applying the second. These sealing techniques minimize cracking, peeling, and moisture penetration over time. Block off the driveway for at least 24 hours after finishing, and avoid driving on it until it’s fully cured.
DIY Driveway Sealing vs. Hiring a Pro

Now that the sealing process is complete, you’ll need to decide: should you tackle future projects yourself or hire a professional? Both options have real trade-offs worth considering:
- Cost comparison: DIY sealing runs $50–$150 in materials; professionals charge $200–$600 depending on driveway size.
- Time investment: Expect 4–8 hours for a DIY project versus a 2–3 hour professional visit.
- Quality: Pros bring commercial-grade equipment and experience, reducing the risk of uneven application.
- Physical demand: DIY sealing requires significant labor, including cleaning, edging, and applying multiple coats.
If your driveway has extensive cracking or damage, hiring a pro makes sense. For routine maintenance, DIY sealing saves money and builds confidence over time.
How Much Does Driveway Sealing Cost?

Understanding driveway sealing costs helps you budget realistically and avoid overpaying. Average pricing typically falls between $0.14 and $0.25 per square foot for DIY sealing, while professional services range from $0.25 to $0.75 per square foot. Regional factors like labor costs, climate demands, and material availability greatly influence what you’ll pay.
| Service Type | Estimated Cost |
|---|---|
| DIY Sealing | $0.14–$0.25/sq ft |
| Professional Sealing | $0.25–$0.75/sq ft |
| Full Driveway (avg. 600 sq ft) | $150–$450 professionally |
We recommend getting at least three quotes from local contractors before committing. Larger driveways often bring the per-square-foot cost down, so don’t assume bigger always means more expensive overall.
How Often Should You Seal Your Driveway?
Sealing your driveway too frequently can actually do more harm than good, so we recommend applying sealant every two to three years for asphalt and every three to five years for concrete. Sealant longevity depends on several factors:
Over-sealing your driveway causes damage — asphalt needs resealing every two to three years, concrete every three to five.
- Climate severity – Harsh winters and intense heat accelerate wear
- Weather impact – Heavy rainfall and UV exposure break down sealant faster
- Traffic volume – Heavier vehicle use shortens resealing intervals
- Surface condition – Existing cracks or damage may require earlier application
Inspect your driveway annually for fading, cracking, or water absorption. If water no longer beads on the surface, it’s time to reseal. Following proper intervals protects your investment and prevents costly repairs down the road.
Driveway Sealing Mistakes You Need to Stop Making

Even with the best intentions, many homeowners make critical mistakes during the sealing process that undo their hard work and shorten the driveway’s lifespan. Among the most common misconceptions is that more sealer means better protection — it doesn’t. Applying thick coats traps moisture and causes peeling. Frequent errors also include sealing too soon after paving, skipping surface cleaning, and ignoring weather conditions. Asphalt needs at least 90 days to cure before its first seal coat. Applying sealer over oil stains, dirt, or cracks won’t hide those problems — it’ll lock them in. We also see homeowners sealing in extreme heat or before rain, which ruins adhesion. Avoiding these mistakes guarantees your sealer actually performs the way it’s supposed to.